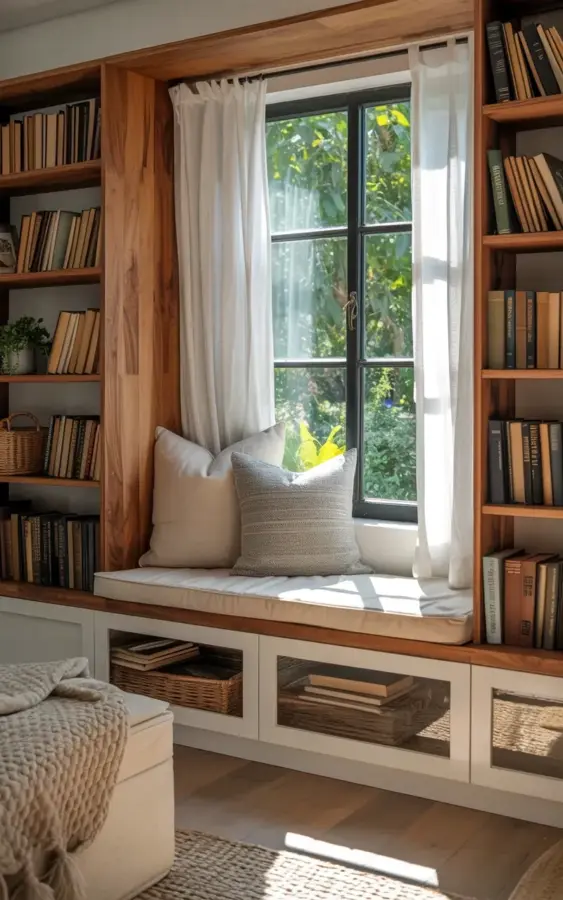
There are two ways to build a window seat nook: the expensive way that looks perfect in magazines, and the thrifty way that actually works in a real house. This budget window seat nook with built-in bookshelves belongs to the second camp, and honestly, it’s my favorite. The white cushioned bench, the natural wood bookcases, the little glass cubbies, all of it looks custom. But none of it required a carpenter. The black-framed window in the middle looks out onto green foliage, and the white floor-length curtains frame it without covering the view. Two pillows sit on the bench, one beige and one gray textured. Simple. Cozy. Doable.
Here’s the thing: most people skip a window seat project because they assume it needs custom carpentry. Or they try it and end up with something that feels off. I’ve made enough mistakes in my own house to know exactly where this goes wrong. So let’s walk through the common mistakes and how to avoid them, one by one.
Mistake #1: Waiting for Custom Carpentry
The biggest waste of time is waiting for a day when you can afford real built-ins. This budget window seat nook with built-in bookshelves gets its custom look from secondhand bookcases. Solid wood, not particleboard. A little sanding, a little stain, and suddenly the grain looks like it was selected by an architect. That natural wood with visible grain in the photo? You can get that from a thrift store for twenty bucks.
Brace the bookcases to the wall so they don’t tip, then set your bench between them. The effect reads as built-in even though each piece can move out in an afternoon. I’ve done this in two houses now, and it works every time.
Mistake #2: Measuring Only the Seat and Forgetting Everything Else
Measure the whole space, not just the width of the window. The cushion needs to fit exactly between the side bookcases. The bookcases need to match the bench depth or sit slightly behind it. The curtain rod needs to clear the tops of the shelves, and the curtains need room to hang without bunching against the books.
I once drove forty minutes for a bookcase that didn’t fit in my trunk. That’s a different problem, but the lesson is the same: measure twice, and bring a tape measure with you when you shop. Also measure the baseboard. One of my shelves butted up against a baseboard and left a weird two-inch gap that drove me crazy for months. You can avoid that by cutting the baseboard or pulling the shelf forward a little.
Mistake #3: Ignoring the Storage Below the Bench
The lower half of this nook is not just a base, it’s a second chance to be useful. In the photo, the storage is two white cubbies with glass panels, each one holding a woven basket. A lot of people leave this area as an open void, and then it becomes the place where dust bunnies go to retire. Or they fill it with random junk and forget the baskets.
Use baskets in the glass cubbies. They hide the mess, but the glass panels let you see the texture of the weave, so the whole thing still looks intentional. You can store extra throws, off-season shoes, or board games in there. Nobody sees the chaos inside the basket. That’s the point.
Mistake #4: Styling the Shelves Like a Showroom
Real nooks get used. If you arrange three perfectly spaced objects on every shelf, then the nook becomes a display, not a reading corner. Fill those natural wood shelves with hardcover books of various sizes. Let the colors clash. Tilt one book, stack three flat, and leave a gap for something that doesn’t match.
I keep a small notebook on one shelf, a ceramic mug on another, and one empty shelf for when I’m drinking tea and reading. No theme. It’s just life.
- Keep books at the front edge or the back edge, not both.
- Use bookends that weigh something, because a leaning stack is a headache.
- Put your current read at eye level, spine out.
- Leave one empty shelf for a cup of tea or a
Leave a Comment